Thursday, January 20, 2011

Vegan Cupcakes

Am I wrong or is there a cupcake renaissance going on? The local bakery downtown has a big sign in their window declaring “We have cupcakes!” as if that would really get people excited, and maybe it has. I’ve noticed cupcake ads in a few other places so perhaps they’re the latest craze in the world of bakery treats.


Of course, with their paper or foil wraps, cupcakes are just portable pieces of cake, and that's probably part of the attraction. A cupcake is easier to eat walking down the street than a slab of cake in a styrofoam container. Also commercially-made cupcakes can be very photogenic, piled high with their swirls of brightly-colored frosting and sprinkles. They make good eye candy but, not being a fan of big piles of frosting, I would probably prefer a brownie.

Anyway it was my wife’s birthday this past week and to celebrate she decided that instead of a regular cake she’d rather have a few cupcakes, which would make our enjoyment of birthday treats more manageable and of shorter duration. Like me she’s trying to stay healthy but realizes the importance of letting go occasionally (key word = occasionally).


A few days before the birthday I purchased three cupcakes from the downtown bakery to see what all the fuss was about. Knowing the standards of the establishment I’m sure the cupcakes were well made with good ingredients (i.e. butter instead of hydrogenated shortening), but we found them rather ordinary and, at $3.00 a piece, a bit pricey as well. Of course this just stoked my desire to make some REALLY good cupcakes for my wife’s birthday.

My wife is lactose intolerant, so it was preferable that the cupcakes contain no cow’s milk or butter. This is where the “vegan” part comes in.
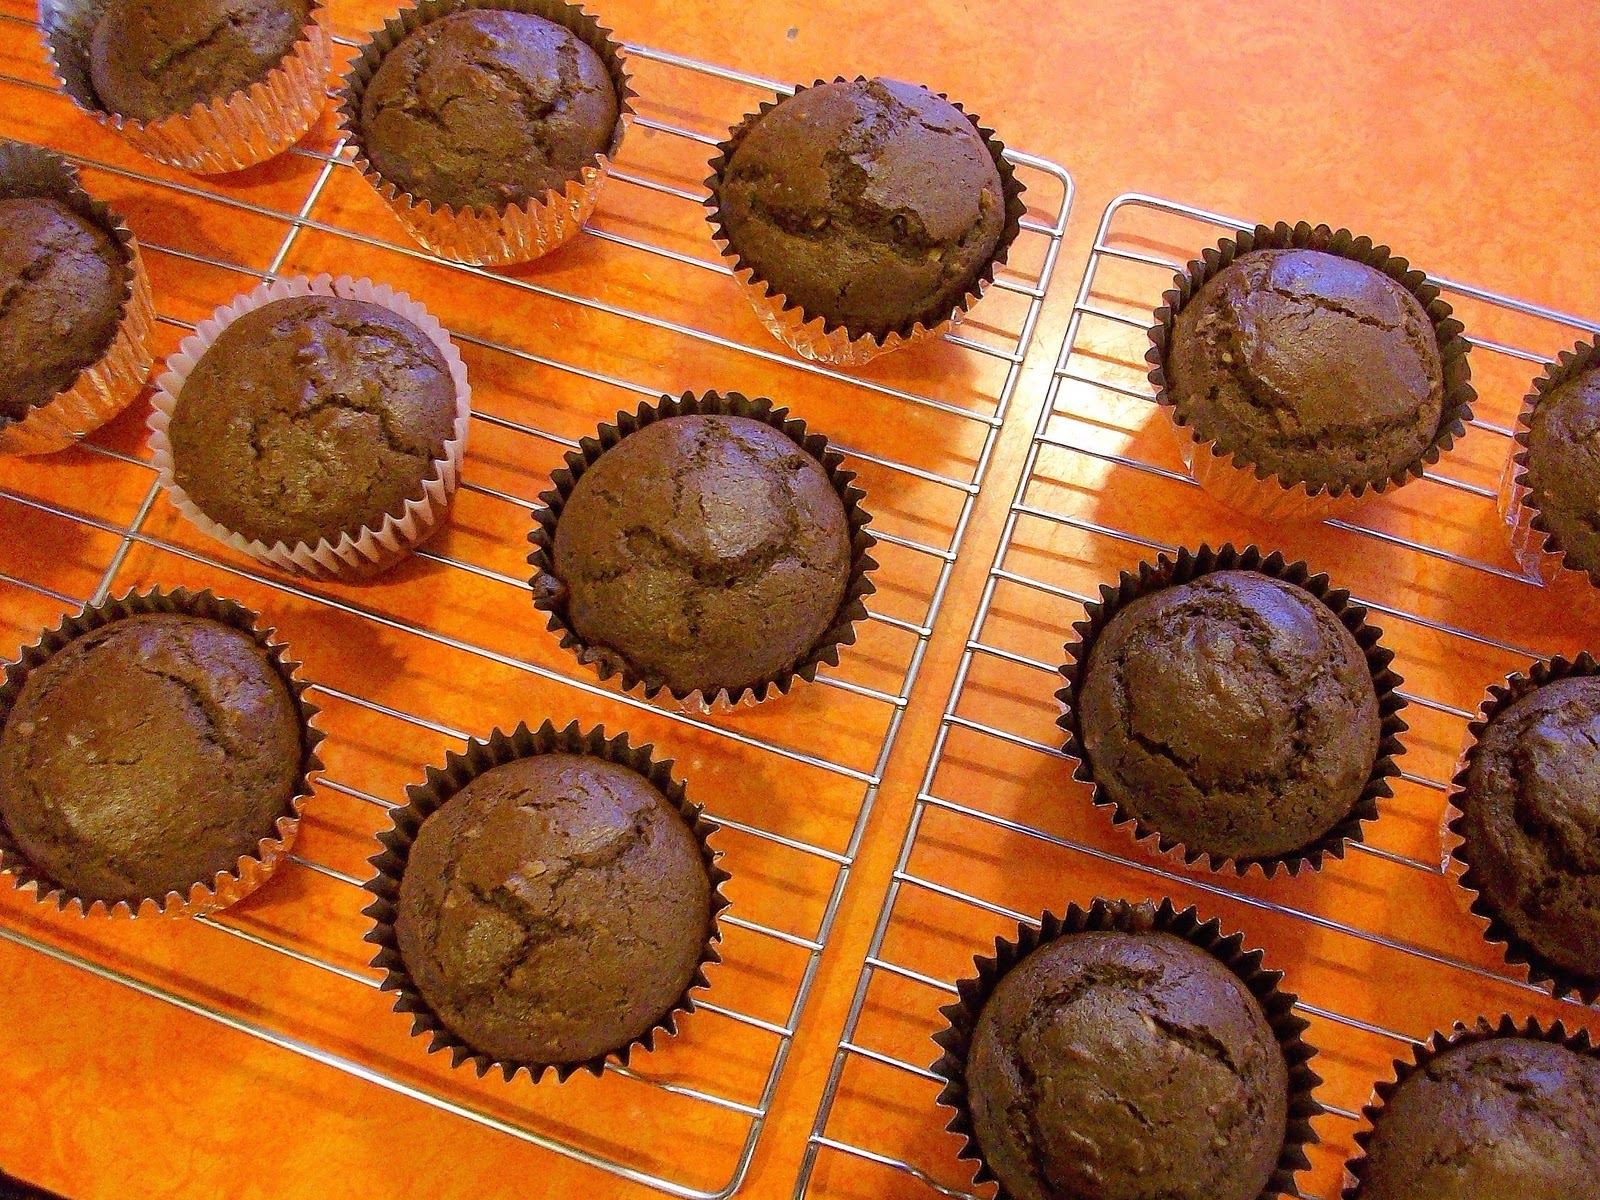


There’s a spunky little book called Vegan Cupcakes Take Over the World by Isa Chandra Moskowitz and Terry Hope Romero that we often rely on when we want to make scrumptious treats without the lactose found in milk products. We’re not vegan but because vegan recipes contain no milk or dairy they fit in with my wife’s dietary restriction.

The really newsworthy point is that these vegan cupcakes are some of the best cupcakes we’ve ever tasted, period. The recipes are not difficult, nor for the most part do they call for hard-to-find ingredients. You can confidently serve these to even the staunchest non-vegans, who will only know that they’re eating something delicious. Vegans, of course, will be appreciative. Well done, Isa and Terry!


The cupcake recipe below is adapted from a recipe in their book. I did not use the recommended icing because my wife wanted a very pronounced coffee and chocolate flavor for the top, so I used a different recipe. Because the frosting needs to sit for a while to reach spreading consistency, you may want to make that before making the cupcakes.

I also insisted on making 18 cupcakes rather than the 12 yielded by the original recipe. Being healthy is great, but birthdays only happen once a year, right?


Vegan Coconut Chocolate Cupcakes with Mocha Frosting
Makes 18

Coconut Chocolate Cupcakes
1 1/2 cups all-purpose flour
1/2 cup unsweetened cocoa
2 teaspoons baking powder
1/2 teaspoon salt
6 Tablespoons vegetable oil
1 1/2 cups coconut milk
1 1/8 cup granulated sugar
2 teaspoons vanilla extract
2 teaspoons coconut extract
3/4 cup unsweetened shredded or flaked coconut

Preheat oven to 350º F. Place 18 cupcake liners in muffin tins, or spray 18 muffin slots with non-stick spray. Stir together flour, cocoa, baking powder, and salt in a bowl. Place vegetable oil, coconut milk, sugar, and extracts in a separate bowl and mix well until sugar loses some of its gritty texture. Add flour mixture to wet ingredients in 3 or 4 batches, beating well after each addition. Mix until smooth, then fold in 3/4 cup shredded coconut.

Fill cupcake liners or muffin slots about 2/3 full. Bake about 25 minutes, or until a toothpick inserted in the center of a cupcake comes out clean. Let cool in pans for 10 minutes, then place on wire racks to cool completely before frosting.


Mocha Frosting
1 cup granulated sugar
1 cup unsweetened cocoa
1 cup soy milk, rice milk, coconut milk, etc.
1 teaspoon vanilla

Combine sugar, cocoa, and soy milk in a medium saucepan. Whisk to make a thick paste. Cook over medium heat, stirring constantly with a wooden spoon, until the mixture comes to a boil. Lower heat and boil gently for 2 minutes, stirring constantly. Remove from heat and add vanilla. Let cool, stirring occasionally, until frosting reaches spreadable consistency. Will keep refrigerated for up to a week.


Decoration
1/2 cup unsweetened shredded or flaked coconut, lightly toasted
Chocolate-covered espresso beans

Top each cupcake with a generous amount of Mocha Frosting. Place one or two chocolate-covered espresso beans on each. Sprinkle with toasted coconut.

Saturday, January 8, 2011

Real Hot Chocolate

I’ve been lucky enough to visit Paris a few times, and one of my favorite places is a salon de thé called Angelina. One of the historic restaurants of Paris, Angelina was built in 1903 and has a wonderfully ornate interior with high ceilings and large street-front windows. It's usually bustling because it's in a tourist area on the rue de Rivoli, but somehow that doesn't diminish its charm. It’s a beautiful space in which to linger with a beverage and pastry, such as the famous Mont Blanc, a sweet “white mountain” of meringue, whipped cream, and chestnut cream.

Thick, NOT watery.

Angelina offers a selection of high-quality teas and coffees, as well as light lunches and pastries. However the real draw, for me and thousands of others, is le chocolat Africaine, arguably the best hot chocolate in Paris (or the world!). To say le chocolat Africaine is rich is an understatement. It’s one of the most intense chocolate experiences I’ve ever had, like a drinkable chocolate mousse, a high point in the life of a chocolate lover. It's very thick and is served in a small pitcher from which you can pour two or three smallish cups, which is about all you'll want. Appeals to open an Angelina franchise in my midwestern city have, alas, gone unfulfilled.

There's a cinnamon stick floating in there.

When the weather turns cold, I find myself longing for good hot chocolate and turn to the recipe below. It’s not as rich as le chocolat Africaine—and that’s probably a good thing—but it is in the same ballpark. Increase the thickness and intensity by using heavy cream, high-quality bittersweet chocolate, and a little less liquid. Decrease the richness by using half-and-half instead of cream, and semisweet chocolate instead of bittersweet. Either way you’ll have a damn fine hot chocolate.

Very warming with a shot of Grand Marnier or brandy.

I often add a cinnamon stick to the chocolate as it heats, or just sprinkle some cinnamon in the cup. Sometimes, on cold Sunday afternoons when I’m not going anywhere, I’ll add a tablespoon of Grand Marnier or brandy, which is extremely warming. Spoon a large dollop of concentrate into your next cup of coffee to make a Café Mocha you will congratulate yourself for.


Real Hot Chocolate
Makes several small cups

For the chocolate concentrate
1 cup heavy cream or half-and-half
8 ounces bittersweet or semisweet chocolate, cut into small pieces

In a small saucepan bring the cream to a rolling boil, then remove from heat. Whisk in the chocolate pieces until melted and smooth. Can be refrigerated for up to 10 days.

For each cup of hot chocolate
1/4 cup chocolate concentrate
1/4 cup milk, coffee, or water
1/4 teaspoon vanilla

Blend the concentrate with milk, coffee, or water. Heat gently, in a small saucepan over medium-low heat or in the microwave, until warm but not boiling. Add vanilla. Add cinnamon, whipped cream, or marshmallows as you like.


Friday, December 31, 2010

Christmas and Truffles

I generally plan and prepare the meals for my family’s Thanksgiving and Christmas celebrations, and over the years I’ve grown tired of preparing turkey-centered feasts for both holidays. You see, my wife doesn’t eat red meat, which is fine, but it puts us in the position of having to figure out the main dish for our Christmas meal. For many years we’d have turkey and all the trimmings for Thanksgiving and again for Christmas, but then I started fishing around for a different Christmas main course, a task that hasn’t been as easy as it probably sounds.

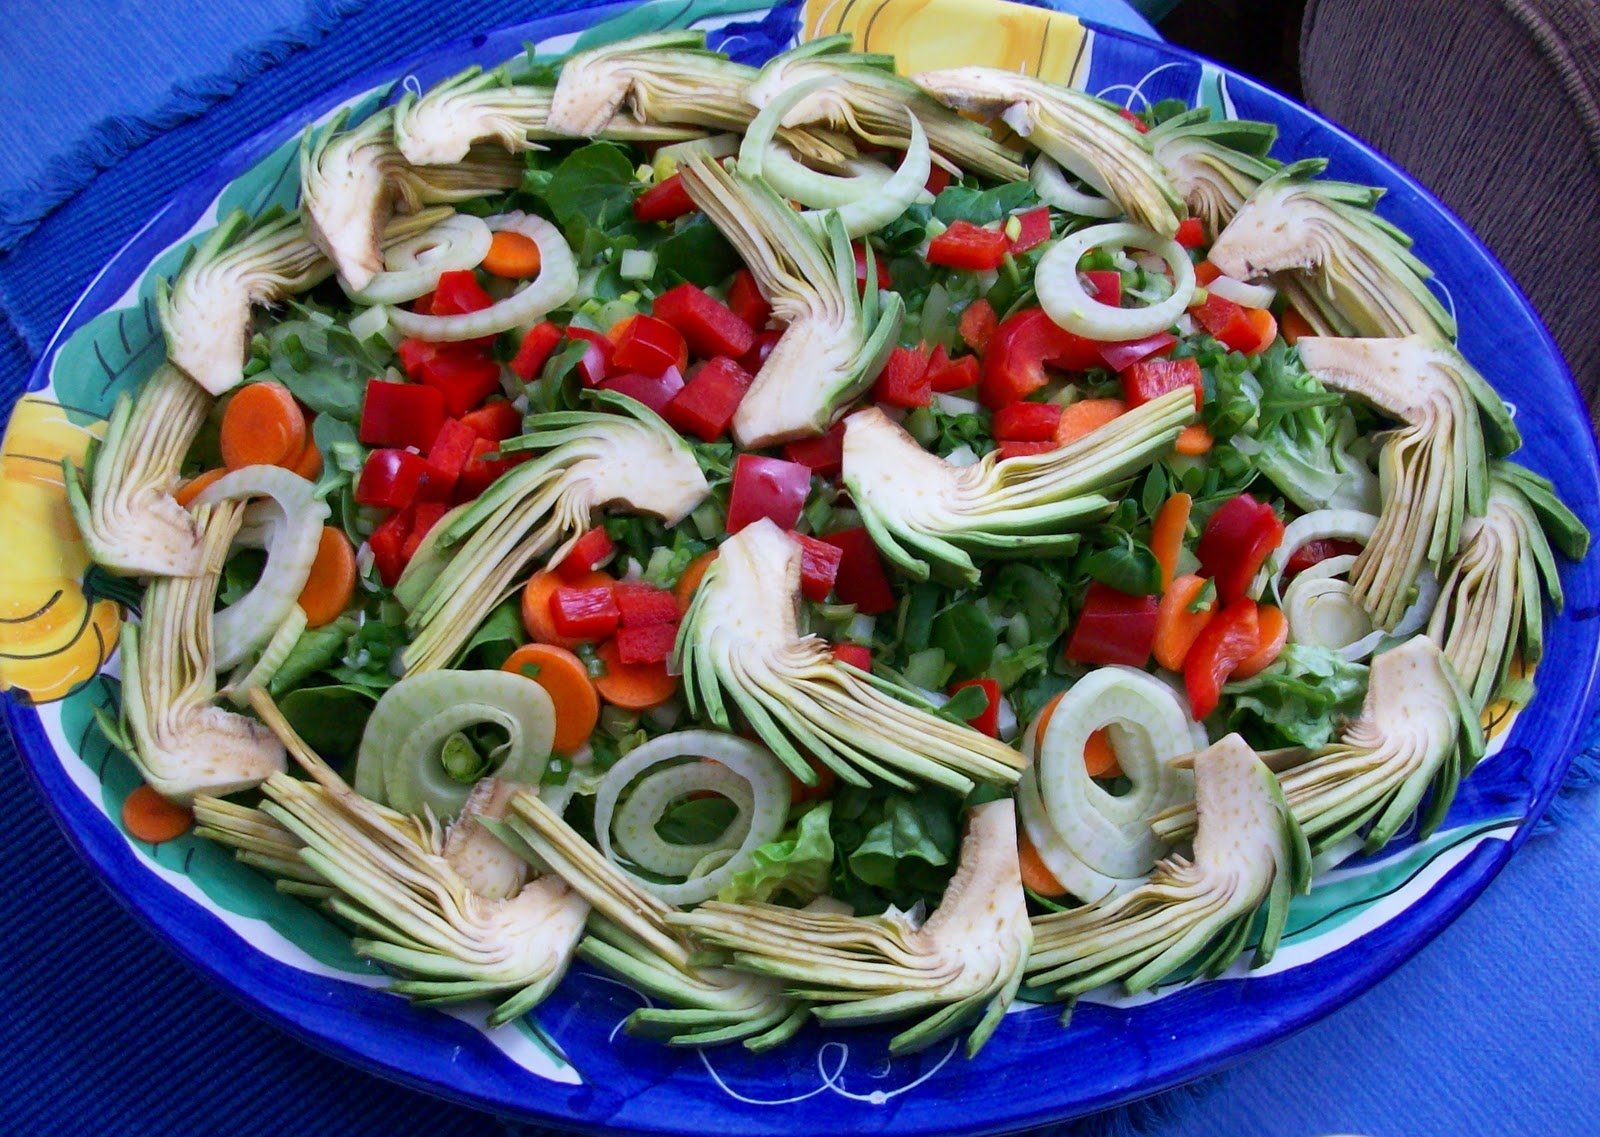
La Grande Insalata Mista

Our Christmas celebration tends to be small: besides me, there’s only my wife, my 18-year-old son, and my 78-year-old father in attendance. But pleasing the palates and dietary needs of just four people can be difficult, especially when it’s Christmas and you want everyone to be happy.

Focaccia topped with rosemary and sage

A couple of years ago we landed on Chicken Parmigiana as our main course for Christmas, which seems to fill the bill all around. In case you’re not familiar with it, this classic Italian dish features boneless chicken breasts pounded flat, breaded, and pan-fried in olive oil. These are placed in a baking dish and topped with Italian tomato sauce, mozzarella, and parmesan cheeses, then baked for a half-hour. This year I upped the people-pleasing quotient by adding turkey meatballs to the tomato sauce, giving us two types of poultry in the same dish(!).

Chocolate-Dipped Hazelnut Caramel Squares

The Chicken Parmigiana got me thinking about appropriate side dishes and led to an entire “Italian Christmas” theme for the dinner table (not including desserts). I relied heavily on Marcella Hazan’s Essentials of Classic Italian Cooking for recipes and inspiration, a cookbook I highly recommend.

For the record, our 2010 Christmas repast consisted of the following:
  • Chicken Parmigiana with Tomato Sauce and Italian-style Turkey Meatballs
  • Whole Wheat Linguine
  • Focaccia – Italian flat bread topped with rosemary, sage, kosher salt, and olive oil
  • Sweet and Sour Onions – small cipolline onions slow-cooked with butter, salt, vinegar, and a bit of sugar
  • La Grande Insalata Mista – a big Italian salad with Bibb lettuce, watercress, fresh spinach, artichokes, fennel, carrots, red bell pepper, and green onions
  • Panettone – Italian holiday bread studded with dark and golden raisins, toasted pine nuts, and orange and lemon zests

Coconut Biscuits. Slightly nutmeggy and very crisp.

In addition we made two different cookies—Chocolate-Dipped Hazelnut Caramel Squares and Coconut Biscuits—which aren’t Italian but complemented the other dishes nicely.

Italian Sweet and Sour Onions

Because my son insists on a devastatingly rich chocolate something for Christmas, I also made Bittersweet Chocolate Truffles. This was the first time I had ever made truffles and they were extremely good, so good that every time I ate one I was amazed at how good it was. If you love chocolate and have even rudimentary skills in the kitchen, you should make your own chocolate truffles. Friends and family you share them with will love you deeply for it, and you will love yourself.

Bittersweet Chocolate Truffles, some dipped in cocoa and some not.

I used a recipe originated by Katrina Markoff, founder of Vosges Haut Chocolat, that appeared in an issue of Bon Appétit a few years ago. There are two ingredients: bittersweet chocolate and heavy cream. With so few ingredients, use the best chocolate you can afford. I used a one-pound block of Callebaut chocolate that cost $20.00. With a yield of 25-30 truffles, we’re talking $.75-.90 per truffle, depending on how big you roll them. That’s not inexpensive, but believe me, you will not regret it.


Bittersweet Chocolate Truffles
Adapted from a recipe by Katrina Markoff
Makes 25-30

Truffle Base
1 1/4 cups heavy cream
9 ounces bittersweet chocolate (70% cocoa), chopped

Truffle Coating
7 ounces bittersweet chocolate (70% cocoa), chopped

Unsweetened cocoa powder (optional)

For Truffle Base 
Bring cream to simmer in heavy small saucepan. Remove from heat and let cool to lukewarm, about 10 minutes.
   Stir 7 ounces chocolate in metal bowl over pan of simmering water until smooth (don’t let bottom of bowl touch the water). Remove from heat and add remaining 2 ounces chocolate. Stir until completely melted and smooth. Stir in cream. Chill truffle base until firm, 2-3 hours.
   Line baking sheet with waxed paper. Using your hands, roll about 2 teaspoons truffle base into a ball. Transfer to prepared sheet. Repeat with remaining truffle base. Chill until firm, about 1 hour.

For Truffle Coating 
Line a second baking sheet with waxed paper and set aside. Stir chocolate in metal bowl over pan of simmering water until melted and smooth. Remove from heat and let cool slightly.
   Dip balls of truffle base into bowl of melted chocolate to coat; you may use your hands to do this. Place on prepared sheet. Roll in cocoa powder if desired.

Store truffles in airtight container and keep chilled. Let stand at room temperature one hour before serving. Will keep for about one week.

Sunday, December 19, 2010

Adventures in Baking 101: Finale

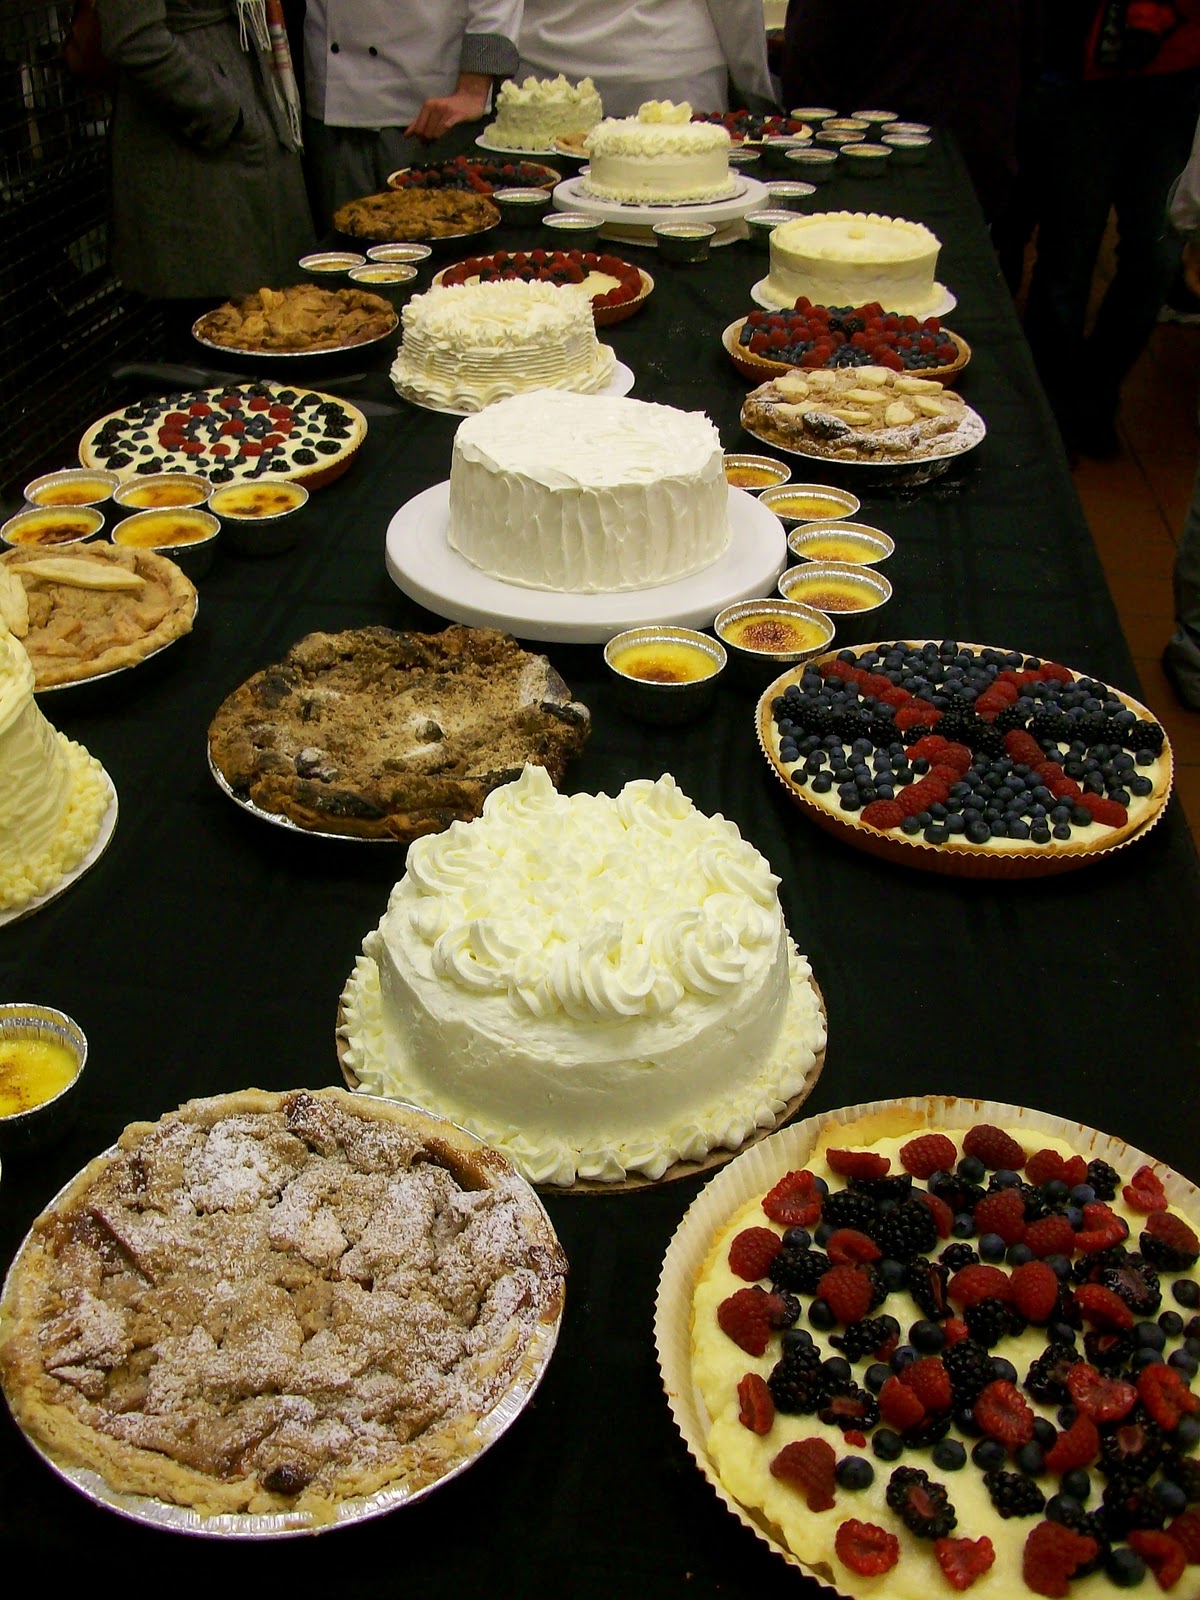
The last two sessions of the baking class are devoted to making four items without assistance from Chef Dennis or classmates. At the end of the last class, the four items will be presented to the chef and to outside friends and relatives, who are invited to the classroom for a look and tasting before we pack up for the semester.

The students' final dishes arranged for presentation.

The final items are the same for all students, and must be made according to the recipes distributed by the chef. They are:
  • An 8-inch white cake, split in half horizontally, iced and decorated in a manner of our choosing. The icing is a vanilla Swiss meringue butter cream.
  • An apple streusel pie, including a flaky pie crust, apple filling, butter-and-brown sugar streusel topping, and pastry "leaves" for decoration.
  • A 9-inch fresh fruit tart. A sweet tart dough is prepared, rolled out and placed in a tart shell, then prebaked without filling (“baked blind”). The cooled, baked shell is filled with vanilla pastry cream, then decorated with fresh fruit.
  • Crèmes brûlées.

We have a total of 8 1/2 hours to prepare all of the above from scratch. In the first session, which is 5 hours, I prepare the cake, frosting, pie dough, tart dough, pastry cream, and crèmes brûlées, leaving all items frozen or refrigerated. The following week we have 3 1/2 hours to finish everything, including decorating the cake, preparing the apple pie filling and streusel, baking the pie, baking the tart shell, filling and decorating the tart, and caramelizing sugar on the crèmes brûlées.


My final cake. It looks a bit rough around the edges,
and I wish I had been more creative with the decoration.

I knew it was going to be a stretch to finish everything on time, and many students, including me, didn’t quite make it, though I came very, very close. My last step before total completion was caramelizing the sugar on the crèmes brûlées. This is done with an acetylene torch and should take only a couple of minutes. Unfortunately, like me, several students left their crèmes brûlées to the end, and I had to wait for a torch. When I finally got one it wasn’t working properly and I spent precious minutes trying to get the flame going. Time was called as I was fiddling with the torch. I didn't quite finish, but I still feel pretty good about what I accomplished.

Apple Streusel Pie. This turned out nicely.

All in all the baking class has been a good experience. I have a much greater appreciation for the science of baking and all the little tweaks that go into making a dish properly. For example, if you look at the photo of the fruit tart, you’ll notice that the crust underwent shrinkage during baking, i.e. it no longer conforms to the sides of the tart pan. Had I let the unbaked crust rest for 15 minutes before baking, this probably wouldn’t have happened, or at least the shrinkage would have been less. Little things like this separate the novice from the pro. (I meant to rest the tart dough before baking, but I was in a hurry and forgot.)

The final fruit tart. You'd eat this, wouldn't you?

I’ve enjoyed the class, but have decided to give cooking classes a break and just cook at home for a while. Next semester I’m taking a course in database management. Au revoir! :)

Tuesday, December 7, 2010

Zaletti

I’ve had this recipe for Italian cornmeal cookies, or zaletti, sitting around since last summer when I saw it on David Lebovitz’s site (www.davidlebovitz.com). In case you’re not familiar with David he is a former pastry chef who worked in the San Francisco area for many years, notably at Chez Panisse. David is now a food writer/bloggist living in Paris (my favorite city!).


Anyway something about zaletti appealed to me, but for various reasons I didn’t get around to making them at the time. Then the Introduction to Baking class started in August, and since I DO try to have a sense of balance about my diet, I haven’t been inclined to make sweets outside of those I’ve brought home from class each week.
 
For various reasons the baking class has yielded no take-home treats for the past few weeks, and I guess I'm getting into the habit of having baked goods around (I know that's bad). So last weekend I decided to finally make those cornmeal cookies. They’re exactly what I wanted: buttery, crispy, not-too-sweet cookies that go well with coffee or a cup of tea. My wife, whose heritage is at least half Italian, seems to really like them.

The rolled logs of dough, wrapped and waiting to be sliced into individual cookies.

I think of zaletti as “everyday” cookies: you can eat two or three every day and not feel like you’ve overindulged. Of course indulging is good too, but sometimes it’s nice to have a plainer cookie you can just sit and relax with, and zaletti do that for me.

Rather than fine cornmeal I used polenta, which gives the cookies a crumbly crunch and texture. For half the batch I used currants (which David’s recipe calls for), and
for the other half chopped dried cranberries. The currants seem to hold their own a bit better. FYI.


Since I essentially made David’s recipe verbatim, I offer the link below to the recipe at his site. Hope you enjoy.

http://www.davidlebovitz.com/2010/07/zaletti-italian-cornmeal-cookie-recipe/

Saturday, November 27, 2010

Cranberry Sauce from Scratch

One thing I like to do in this blog is make readers aware of dishes or ingredients that I love, but that seem to be overlooked or disliked by people I come into contact with. It’s two days after Thanksgiving and I’m reminded that from-scratch cranberry sauce falls into this category, which is puzzling.


It’s puzzling because, of all the dishes I serve for Thanksgiving—including roast turkey, gravy, mashed potatoes, corn pudding, biscuits, a green vegetable—cranberry sauce is the easiest and quickest to make. It generally takes about 20 minutes, and can be made up to four days ahead. Fresh cranberry sauce is so rich and flavorful that it’s perennially singled out as being especially delicious at the Thanksgiving table. Why would anyone serve the canned version?

For the last several years, any time I've participated in a Thanksgiving or end-of-year potluck, I've opted to bring fresh cranberry sauce. It’s the perfect pitch-in dish: quick to make, inexpensive, and you don't have to heat it before serving. (I tend to be a bit lazy about my potluck contributions.) There are always a few poor souls who have never tried cranberry sauce made from scratch, and it's nice to make them aware of something good they didn't know about.

Preparing a basic cranberry sauce is easy. Combine a 12-oz. bag of fresh cranberries, two cups of water, and one cup of sugar in a non-aluminum saucepan. Bring this to a boil and simmer 10-15 minutes until the cranberries burst and the sauce has thickened somewhat. Remove from heat, let cool, and refrigerate until cold. Right there you've got a sauce that's better than the gelatinized canned versions.

But you can go much farther. Like orange flavor with your cranberry sauce? Use orange juice for some or all of the water, or add minced orange zest. Boost the cranberry flavor by using cranberry juice instead of water, or dried cranberries in addition to the fresh. Toss in some golden raisins, fresh ginger, or chopped fresh pear. Flavor it with cinnamon, cloves, or cardamom. It's endlessly adaptable.

Leftover cranberry sauce never goes to waste in my household. Of course it can be served with Thanksgiving leftovers or in one of those monster sandwiches with turkey, mashed potatoes, and gravy. But in recent years I’ve taken to using cranberry sauce like any other fruit compote or chunky jam, which opens additional possibilities. It’s delicious with leftover biscuits and a pot of tea for breakfast or in the afternoon. It’s also good on pancakes, dolloped on a bowl of oatmeal, or just by itself for a refreshing snack.

For Thanksgiving this year my son and I made a cranberry sauce with dried cherries, dried cranberries, and cloves (recipe below). The original version called for one cup of sugar, but we prefer our sauce less sweet, and cut the sugar to 1/2 cup. (I’ve used as little as 1/4 cup sugar per 12-oz. bag of cranberries, which results in a more tart sauce that is still sweet enough for our tastes.) The cherries add a bit of sweetness and complement the cranberries nicely. You’ll need about 8 oz. of dried fruit, which can be any ratio of dried cherries and cranberries.


Cranberry Sauce with Dried Cherries, Dried Cranberries, and Cloves
(Adapted from Bon Appétit magazine)
Makes about 4 1/2 cups

2 1/2 cups cherry juice, cherry cider, or cranberry juice cocktail
6 oz. dried cherries
2 oz. dried cranberries
1/2 cup sugar
12 oz. fresh cranberries
1/4 teaspoon ground cloves

Bring juice to simmer in heavy large saucepan. Remove from heat. Add dried cherries and dried cranberries and let steep for 10 minutes. Mix in sugar, then fresh cranberries and cloves. Bring to a boil, then simmer over medium heat, stirring occasionally, until cranberries burst and sauce thickens slightly, about 10 minutes. Remove from heat, let cool, and refrigerate until cold, about 4 hours. Sauce will thicken as it cools. (Can be prepared 4 days ahead. Cover and keep refrigerated.)

Saturday, November 20, 2010

Adventures in Baking 101: Stollen, Coconut-Cream Cheese Brownies

Baking class, week thirteen. Stollen (pronounced “shtollen”) is a traditional German bread, usually served during the Christmas season. Our instructor, Chef Dennis, was raised in Germany and used to eat stollen as a child, so perhaps he has a fondness for it. After trying it, I know I do.

The final stollen, dusted with powdered sugar.

Stollen is sometimes described as a cake but it strikes me as more of a bread, as it’s made with yeast and has a bread-like crumb. It’s not very sweet, except for all the additions studding the loaf, which in our case included dried cherries, raisins, candied orange peel, and toasted almonds. The recipe calls for the raisins to be soaked in rum, and I’m sure that would have been terrific, but no alcohol is allowed on school grounds so I’ll have to save that for when I make stollen at home (which I will).

Stollen cut open to show the raisins, dried cherries, and almonds inside.
The large chunk in the lower right corner is marzipan.

Stollen’s real kicker is a log of marzipan, or sweetened almond paste, that runs through the center of the loaf. After mixing and rising, the stollen dough is rolled into an oval about 3/4” thick. A chunk of marzipan is shaped into a log about an inch thick, then placed on top of the dough. The dough is folded over—completely encasing the marzipan—brushed with egg wash, then baked.

Europeans have a fondness for marzipan, which they consume in various forms throughout the year, especially during the Christmas holidays. On the other hand many Americans, including some of the students in the baking class, seem to be wary of marzipan, like they consider it a bit weird. I assume Chef Dennis is intentionally exposing us to foods outside our comfort zones.

After the stollen was baked, we cut open a loaf and had a taste test. Fresh from the oven, it was so delicious I could have eaten half a loaf myself (especially since it was 8:30 p.m. and I hadn’t eaten for seven hours). However I sensed a lack of enthusiasm among some of the students, and a few didn’t even try it. One or two who did try it commented that the orange peel was too strong and overshadowed the other flavors, which I did not find to be the case. Perhaps in their minds stollen is too similar to that much-despised holiday treat, the fruitcake.


Chocolate brownies with coconut-cream cheese filling swirled on top.
They were delicious, but we need to work on our decoration skills.

I’m sure I’m in a minority here in the Midwest, but I think fruitcake gets an undeserved bad rap. It’s become a cliché to dislike fruitcake, even among those who have never tried it. A well-made fruitcake, with a good balance of fruit and nuts, is a rich and wonderful thing. Perhaps, like marzipan, it appeals more to European tastes. I make a fruitcake that includes fresh or frozen fruit (I generally use frozen cherries), nuts, dried fruit, and coconut. Rather than candied fruits I include golden raisins and dried cherries. It’s simple to make and REALLY good. Let me know if you’d like the recipe.

Coconut-cream cheese brownies. It's hard to see in the photo but there is
a layer of coconut filling running through the center of the brownies.

For our second endeavor of the class, Chef Dennis challenged us to make a batch of brownies, stipulating that the recipe had to be altered in at least one significant way, i.e. not just adding nuts. My partner and I decided to make a coconut-cream cheese filling, which we spread in the middle and on top of the brownies before baking. They turned out really well. With all my talk of “European” tastes in this post, I’m reminded that the brownie is an American invention, and, when made with good ingredients, is one of the most satisfying pastries on either side of the Atlantic.

Take home: one loaf stollen, about twelve coconut-cream cheese brownies.